|
How to Install a Faucet
In today's tight economy, a penny saved is a penny earned. If you're looking to replace an old kitchen or bathroom faucet with a newer more attractive model, there's no need to hire a plumber to come out and do the "dirty work" for you - this guide can be your companion as you tackle this common do-it-yourself plumbing task.
|
 |
Pick out a kitchen or lavatory faucet (at Faucet Depot, of course) that matches your taste in design and the decor of your home. If you are looking for a deal, allow us to recommend two of our current Delta faucet specials:
|
 |
|
To install your faucet, you may need some or all of the following items, depending on the product you choose and the setup of your kitchen or bathroom:
| • Adjustable wrench |
• Plumber's putty |
| • Tongue and Groove Pliers |
• Flashlight |
| • Basin wrench (for top mounted sinks only) |
• Water supply lines |
| • Teflon tape and/or Pipe Thread Sealant |
• Utility knife |
Some of these items you can buy at Faucet Depot.com:
|
 |
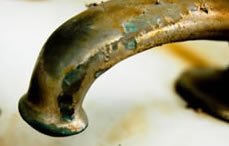
First things first. Get rid of your existing faucet. To do this, you'll need to turn off the water supply to the faucet by closing the shut off valves on the lines that supply water to the faucet (usually under the sink) or by shutting off the main water supply to your home (usually found near your water meter). Next, turn on the tap to allow any water that is remaining in the lines to drain from the lines into the sink.
Using your adjustable wrench, disconnect both the cold and hot water supply lines that are running to your existing faucet at the base of the faucet. In most instances, you will be using these same lines for your new faucet. If not, disconnect the lines at the shutoff valve. |
 |
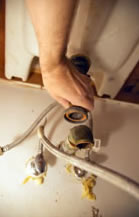 |
You are now ready to remove the existing faucet, which will be attached either from the bottom or the top of the sink. If your existing faucet is bottom mounted, you'll remove it from the top of the sink by taking off the faucet handles and escutcheon to expose the nuts that are holding the faucet in place. Simply take the nuts off using your wrench.
If your existing faucet is top mounted, then your faucet is being held in place by nuts that you will find underneath the sink - which is where you'll need to get to remove them (this is where the flashlight will come in handy). Most of the time, tongue and groove pliers can be used to loosen these nuts; however, if the space is super tight then you may need to use a basin wrench. Once the nuts are removed, you should be able to lift the faucet up and off. Any caulking that might be holding the faucet to the sink can be loosened with your utility knife.
Use your utility knife also to remove old caulking or other residual buildup from around where the old faucet once sat. Silicone remover (available at any home improvement store) can be used to blast away any old remaining silicone. |
|
 |
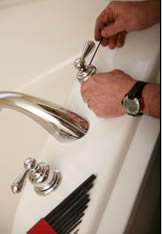
Now for the fun part. For bottom mounted faucets, place the faucet where it goes, put on the washers and nuts, and tighten by hand. Next, line the faucet up perfectly with the back of the sink and tighten the nuts by hand. Using plumber's putting or silicone caulking, run a band of either material around the faucet's base.
For top mounted faucets, you will follow an almost similar process. However, you will put your plumber's putty or silicone caulk in place before you put the faucet into the openings of the sink. If you have a buddy, now is the time to ask him to work on the top to hold the faucet and keep it aligned while you work beneath the sink to tighten the mounting nuts with a wrench. |
 |
Your final step is to install the escutcheon and the handles of the faucet. Like the tools required to install your beautiful new kitchen or bathroom faucet, Faucet Depot also stocks a massive assortment of handles, inserts and escutcheon plates to add the finishing touches to your new faucet installation.
|
|
|
 |
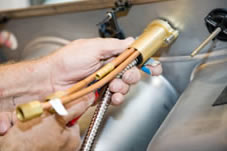
Your next step is to reattach the water lines to the new faucet, turn the on, and check for any leaks in your new faucet. You may have to repair your water supply lines when replacing your faucet.
Clean up any remnants of putty or caulk before it has time to harden, as well as the faucet and sink it is installed in.
|
|

|
|
 |
| Finally, take the aerator out of the new faucet, turn on the water, and let it run for a few moments to flush out any metal scraps and such that might be left from the manufacturing process. Enjoy your handiwork and take pride in knowing that you "did it yourself". |

|
|